Kids Outside Art Activities
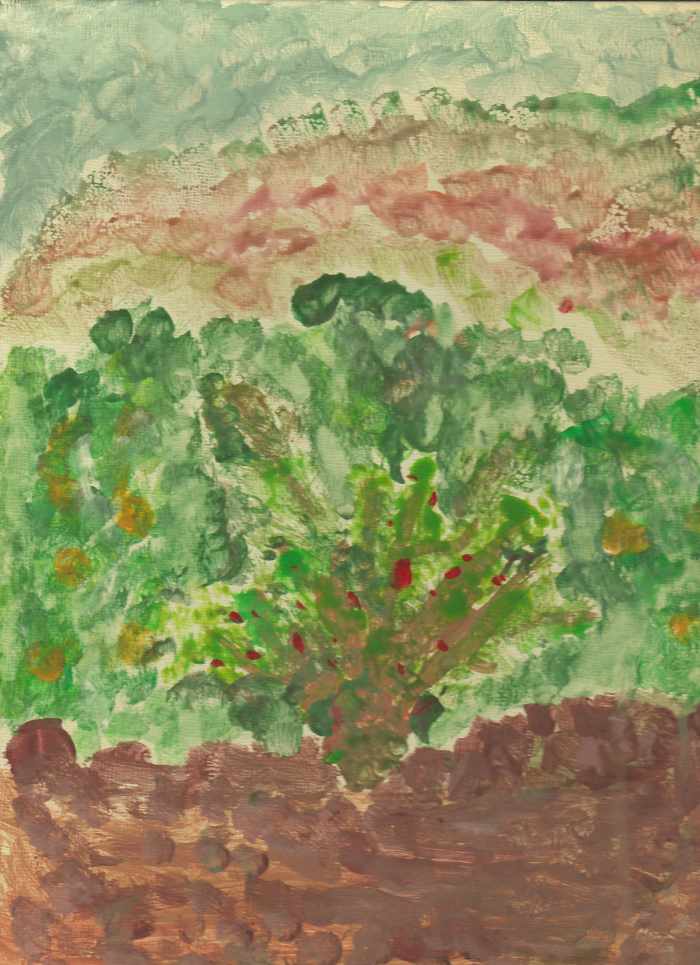
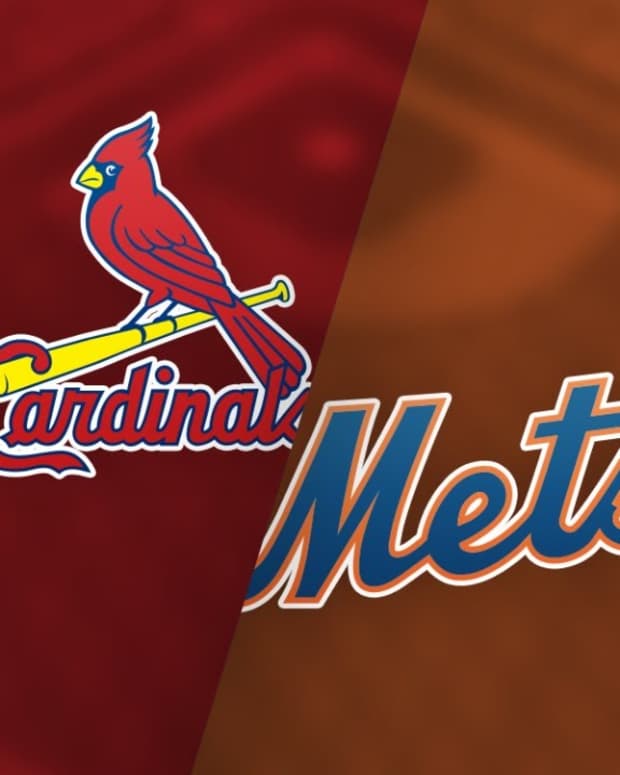
My daughter was around 10 when she did this painting after we'd looked at some Impressionist paintings.
Melovy's daughter
Who This article Is For:
This article contains suggestions for outside art activities for parents and children to do together. Several of the activities could also easily be adapted for use in schools.
From an early age you can introduce children to art activities outside. In fact, taking ordinary art materials outdoors is a great way to reduce mess in the house! When my kids were little we often moved the paints and paper out onto the patio and then splashes didn’t matter. If the weather is calm, you can just lay the paper on the ground and paint. If it’s windy, you will need to use something to keep paper in place: either fasten paper to a board with bulldog clips, or keep paper on the ground with stones.
Small children will also enjoy joining in on tasks such as gathering leaves for pressing or arranging objects into art.
Around the age of 3 or 4 they can draw with chalks or do some simple rubbings, and by school age they can do most of the activities suggested here.
This article is divided into 2 sections: the first has ideas for how to use traditional art techniques to record what is seen around us when outdoors. The second section involves more interaction with what we see.
A professional Impressionist painting

Paint like the Impressionists
The picture at the top of this article is one my daughter painted after we looked at some Impressionist paintings. The Impressionists were a group of painters who lived in France in the 19th century and whose work revolutionized art. They liked to paint outside, known in France as “en plein air.” The Impressionists were interested in capturing the effects of light. Because light changes rapidly, they painted quickly, and in their paintings brushstrokes are easily visible.
Impressionism is a perfect way to introduce painting landscapes to children of around 8 – 10. By that age children are able to comprehend instructions more easily; on the other hand they are also becoming aware that they can’t always get pictures to come out the way they’d like, and can lose confidence. Instead of trying to a paint a perfect picture and worrying that they don’t have the drawing skills, they can enjoy learning about painting techniques, color and how light or distance affects it. In my daughter’s painting she has created depth by making the background more subdued.
Older children and teenagers can also enjoy this activity: I loved setting up my board and painting like the Impressionists when I was learning about them in High School. This was when I first tried oil paints: not recommended for younger children!
Painting boards available on Amazon
Choosing the right brushes
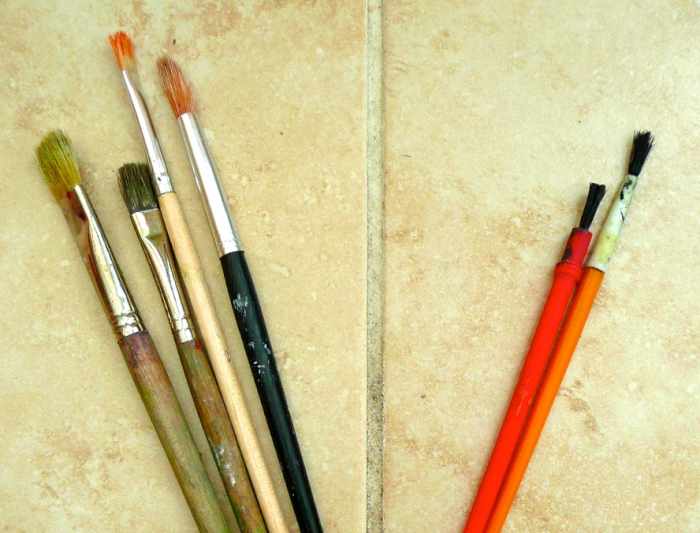
The brushes on he left of the line are all good for painting outside; those on the right are not.
Melovy
Before you go outside:
Take a look at some Impressionist landscapes together. If you don’t have any in your house, don’t worry – there are many on the internet. Wikipedia Commons is a good place to look. The painting by Claude Monet shown above is one of many that you can see there.
Equipment you will need:
Art boards. For best results, I recommend using artboard rather than paper. Paper wrinkles when it gets wet; art board does not. Another advantage is that an art board is far easier to handle outside than a sheet of paper!
You can buy packs of art boards cheaply in Lidl or Aldi stores, or Amazon has packs of 12 that are very good value. Another alternative is to use cardboard that you have saved from shoe boxes or other packaging. This will not be as good as art boards, but will be much better than paper. As long as you or your children mix the paint thickly, the grey cardboard will not show through.
Paint. You don’t need any special paints – ordinary kids’ ready-mixed poster paints will do fine. If you want to be authentically “Impressionist” then limit your use of black paint! Although some Impressionists did use it, they generally used small quantities.
Brushes. It’s fine to use brushes aimed at children, but do make sure the bristles are firm rather than floppy. Flat brushes are particularly good because you will be working quickly rather than trying to paint detail. The brushes to avoid are those often found in kids’ painting sets but that are so floppy they make it hard for children (or anyone) to control the brush. Usually they have plastic handle and a few nylon bristles that splay out into a cone shape. See the photo opposite for what to use and avoid.
Water. It's best to take water out in a plastic container to avoid breakages.
Optional: an easel. If you have an easel for your kids to use, it can make painting outdoors more fun, but it’s not essential. Without an easel, everyone just sits on a bench or rock with the board on their lap.
How to paint like the Impressionists
Instead of very carefully blending paint, the Impressionists used short brushstrokes of different colors so that most of the blending is done by our eyes when we view their paintings. (The Pointillists developed this even further by placing dots of color next to each other.)
Choose where you will paint, and then draw a rough outline, either in paint or with a pencil. Then, using a fairly stiff brush, paint in short strokes.


Melovy
Playing Around with Color

Melovy's kids

Melovy's kids
Sketching for Kids
As well as painting like the Impressionists, kids will also enjoy sketching like artists. All they need for this are a few pencils and a sketchpad. The sketches can be detailed or just a quick outline. As with the painting exercise, it’s a good idea to show children examples of artists' sketches so that they realize everything doesn’t have to be finished off. Often a drawing where one part is done in detail and the rest left sketchy can be beautiful.
Opposite is an examples of a partially completed sketch. The cat moved before I could finish the drawing! If children realise this happens and that it doesn't matter, they can relax and enjoy drawing any subject.
Photography
Although you may be taking photographs of artwork that you leave behind, photography can be an art in its own right. Children (and adults) can learn about composition by noticing what works well in a photograph and what does not. Older children can also have fun and learn about color by playing around with different settings. For example our camera has a setting that picks out one color and leaves the rest of the photograph black and white. Opposite are some examples of photos my children took by playing around with this option.
Collecting objects to make into art
There are many different ways you can approach this.
- You can create art right where you are, and leave it for other people to enjoy and for the elements to absorb or change.
- You can collect objects and take them home for use later on.
- You can take rubbings of objects you find.
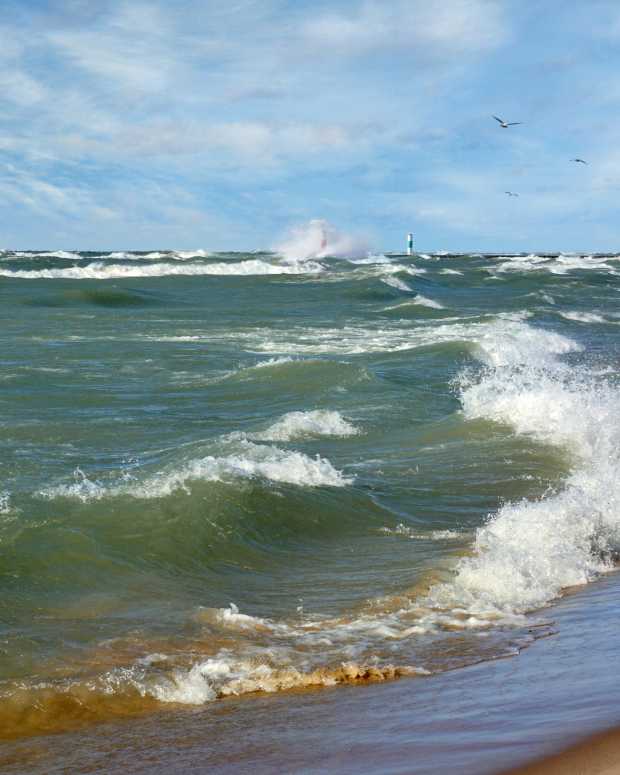
Beach "Sculpture"

Not all artwork needs to be permanent
Melovy's daughter (with permission)
1.) Create Art to leave behind.
Art doesn't need to be permanent, and nor do you need to take it home with you. We are all familiar with sandcastles, but how many of think about them as art? They are of course, and some people even take part in sand sculpture contests. The joy is often in the creating, particularly for children. If you have a camera you can take a photograph as a reminder; we did this with the sculpture above, which one of my daughters made with seaweed and stones.
Installation by a professional artists.

Some professional artists make non-permanent art installations in other places besides the beach. There are artists who carefully arrange rocks on mountain tops or in remote empty spaces. Some choose to create in more public spaces. The photograph on the right is of a project at Los Angeles Arboretum. The sculpture is made of willow and although it will probably last longer than yours may do, it will eventually be returned to the earth by the elements.
When it comes to creating art with objects found in nature, there are no rules for what you can make, but do be sure not to destroy nature in the process. It is also a good idea to be sure that nobody will object to you making art in any particular space. My daughter created the sculpture in the photo at the top of this section by the edge of a quiet beach. A woman came marching down a nearby garden path, and ordered her to remove it. It turned out that the land belonged to this woman.

2.) Collect Objects to take home.
You can use objects you have found to make into collages. Suitable objects might be shells (or pieces of shell), dry twigs or dried up leaves or seeds.
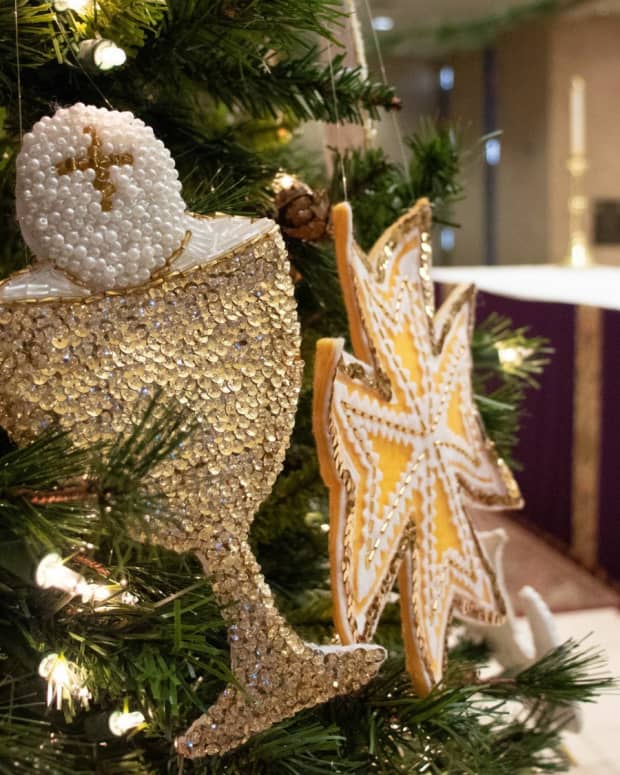
Another way to use them is to collect leaves or garden flowers to press and then later on add them into pictures. It's fun to make cards for birthdays or Christmas this way. In some countries it is an offence to collect wild flowers. If it is allowed in your country make sure you don't pick flowers that are rare. Stick to varieties that are abundant.
Opposite is an example of a card made with pressed flowers, created by a professional designer Marianne Ryder.
Rubbings of leaves and woodgrain make a tree

take some rubbings
Melovy
3.) Rubbings
You have probably heard of brass rubbings, and they can be fun. But young kids also enjoy taking rubbings of buildings or objects found in nature. Anything with a definite texture will do! Here are a few suggestions of where to take rubbings. The picture opposite contains rubbings of leaves and a wooden fence. The picture below right shows these cut into shapes and made into a picture.
- Wooden benches or fences
- Leaves
- Rough surfaces such as a concrete patio or brick wall – collect a variety of rubbings from different surfaces.
Equipment you will need to take Rubbings
- Paper: Choose a paper that is fairly thin, no more than 90 grams per square meter (90 gsm). If the paper is too thick the rubbings won’t be so detailed.
- Wax crayons: The thick stubby kind or block crayons are best for small fingers. They break less easily. Beeswax crayons are a good alternative to paraffin wax crayons, especially for smaller children who sometimes try to eat crayons. Most crayons are not recommended for children under 3, due to their small size.
- Paper or card to make a finished picture: This is optional; some children might prefer just to do the rubbings.

Here, the shapes were cut out and made into a tree.
Melovy
How to take rubbings:
Please note, small children up to around age 6 may need help holding the paper or objects in place. Lay leaves or other small objects on a flat surface before taking a rubbing.
- First make sure your chosen object is dry. Lay the paper over it. If you or your child is taking a rubbing from something large, such as a fence, decide how much of the paper you want to fill with that one texture.
- Lay the long side of the crayon flat on the paper and move it over the object. When taking rubbings of small objects such as a leaf, color over a large enough area for the edges of the object to show. (Take a look at the top leaf on the sheet of rubbings above right: you can clearly see the edges. That’s perfect!)
When your kids have taken one rubbing, encourage them to see how many objects with different textures they can find. Use a variety of colors too.
When you have filled a sheet with textures, it can be fun to go indoors to cut out shapes and make a picture. The tree opposite has was made with rubbings of leaves and wood-grain . Rubbings from a patio or bricks could be used to make a house.
Or your kids might prefer a brick textured tree!
Art on your doorstep.
And finally, an activity that doesn't quite fit into either of the two main categories, but that appeals to children for many years: drawing with chalk on the sidewalk or on a patio. There are many chalks available that can easily be washed off. Your little ones may not want to wash them off straight away, and our children's chalk drawings often stayed until the rain did the job for us.

Melovy
Comments
Patricia Scott from North Central Florida on December 22, 2012:
These great ideas are experiences all children should have. My grandson who is 2 loves to use chalk to create his little pictures which are very simple.
Developing a love for art and for expressing themselves through art is another avenue to tap into the child's feelings and ideas. Thank you for sharing this with us. :) ps Sending Angels your way.
Yvonne Spence (author) from UK on October 12, 2012:
Hi Rebecca, and you are right parents get to have fun too. Thanks for your comment.
Rebecca Mealey from Northeastern Georgia, USA on October 11, 2012:
These are great for those earthy kids who love the outdoors....and their parents!
Yvonne Spence (author) from UK on October 11, 2012:
Thanks ishwaryaa, I will pass on your kind comments to my kids. And of course you can link to this hub. Thank you very much!
Ishwaryaa Dhandapani from Chennai, India on October 11, 2012:
An engaging and helpful hub! Your kids are very talented and your daughter's Impressionist painting is amazing! The list of art activities listed by you here are explained in a detailed manner. The photos are charming! Well-done!
P.S. I seek your permission to grant me the honor of linking this hub of yours to my old hub based on art.
Thanks for SHARING. Useful, Awesome & Interesting. Voted up & shared
Yvonne Spence (author) from UK on October 03, 2012:
Hi Gail,
Thanks so much for your feedback on my daughter's painting. She did it a few years ago and now thinks it isn't good (I disagree obviously.) I'll let her know your feedback.
Glad you also like the suggestions. Some might discount photography, but I definitely count is art - you can learn so much about composition and colour. Thanks very much for sharing. I'll look you up on Pinterest!
Gail Sobotkin from South Carolina on October 02, 2012:
What an awesome hub for budding young artists!
Your daughter's impressionist painting was beautiful.
I also like the fact that you included tips and suggestions for several different types of art that will encourage kids to explore, paint and take photographs of nature.
Voted up across the board except for funny and shared on Pinterest and HP.
Hub Hugs,
Gail
Yvonne Spence (author) from UK on September 30, 2012:
Marcy, thanks for your comment and I feel honoured to read that you learn from the art hubs.
Marcy Goodfleisch from Planet Earth on September 26, 2012:
Such great art examples! I have to say, the kitty captured my heart, big time! I always learn from your hubs about art - they're full of good information and tips!
Voted up and up!
Yvonne Spence (author) from UK on September 14, 2012:
Randomcreative, you are right, there is something for everyone here, no matter their age - even for adults! I enjoyed doing them with the kids! Thanks for your comment.
Yvonne Spence (author) from UK on September 14, 2012:
Thanks manthy.
Yvonne Spence (author) from UK on September 14, 2012:
Glimmer Twin Fan, I wish you and your daughter a great time with whichever activities you try this weekend! Thanks for your comment.
Yvonne Spence (author) from UK on September 14, 2012:
suzettenaples, we have had fun with all of these activities.Thanks very much for your kind comment and for sharing.
Yvonne Spence (author) from UK on September 14, 2012:
Summerberrie, I agree with you that we are all creative and that it is so easy to squelch. A few years ago I was surprised to read that praising kids for the outcome of their creativity can dampen their enjoyment of it. I wrote a bit about this in another hub, but basically, if we lavish praise then that becomes the goal of the creativity rather than just the intrinsic enjoyment. Many of us then spend most of our lives trying to get that enjoyment back.
Thanks for your comment.
Yvonne Spence (author) from UK on September 14, 2012:
TeachableMoments, I am especially pleased to see you plan to use them with your class because when I was a teacher kids always loved going outside - and I enjoyed taking them. Thanks for your comment.
Yvonne Spence (author) from UK on September 14, 2012:
Thank you Nettlemere for your very kind comment.
Yvonne Spence (author) from UK on September 14, 2012:
Bill, I'm with you on developing a creative mindset: it makes life so much more fulfilling. Sometimes mine still watch TV (or play on computers) especially now they've hit the teens, but they do create too - even on the computers. (But you can't do that outside and I think getting outside is important too.
Yvonne Spence (author) from UK on September 14, 2012:
Thanks TTombs, glad you like the ideas and thanks for sharing.
Rose Clearfield from Milwaukee, Wisconsin on September 12, 2012:
What an awesome round up of ideas here! There is something here for everyone. I love that you can adapt so many of these activities for a wide range of ages.
Mark from Alabama,USA on September 12, 2012:
Very unique - I have voted this gem up!
Claudia Porter on September 12, 2012:
What an awesome hub! I love these ideas and may just have my daughter do one of them this weekend. She loves chalk already and also loves to paint rocks. Thanks for such great ideas. Voted up!
Suzette Walker from Taos, NM on September 12, 2012:
What wonderful and lovely ideas for art for children. Very clever and creatively presented also. Thanks for the suggestions and information. This is so informative. They all look like great ideas. Voted up and sharing.
summerberrie on September 12, 2012:
Beautifully done, Melvoy. It always saddened me as a teacher seeing kids struggle to be creative. Somewhere it was squelched, because I think all humans are wired to be creative. These are great tools for parents to do to encourage that creativity in their kids!
TeachableMoments from California on September 12, 2012:
This is a wonderful hub. Great ideas and beautiful pictures. I will try some of these with my daughter and the children in my class. Thank you for the awesome ideas! Voted up, way up!!
Nettlemere from Burnley, Lancashire, UK on September 12, 2012:
loads of brilliant and really well explained fun ideas. And I can't believe how you make a few pencil lines look like a lifelike cat. Very impressed.
Bill Holland from Olympia, WA on September 12, 2012:
Wonderful ideas Mel; I am all for kids and art; anything to get them into a creative mindset and away from television. Bravo with this one!
Terrye Toombs from Somewhere between Heaven and Hell without a road map. on September 12, 2012:
Those are some wonderful ideas, melovy! And almost all kids would get a kick out of these activities. Voted up and sharing.