11 Tips for Painting Outdoors With Oils
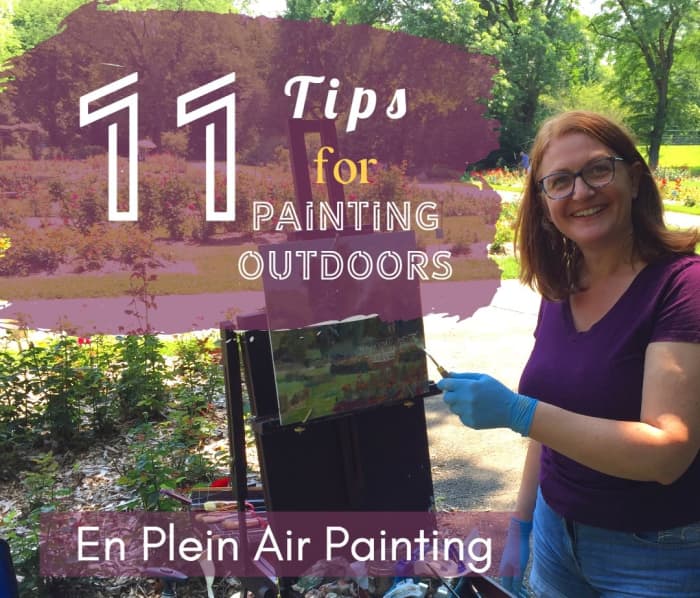
If you are used to studio painting, the first few paintings you do outdoors are going to be very challenging. These tips can help you make outdoor painting a little easier.
Robie Benve, all rights reserved.
Why Is Outdoor Painting So Popular?
Most professional artists strongly recommend painting from life and on location, avoiding using photos as a reference.
They have excellent reasons. Painting outdoors, also known as en plein air, lets you directly observe and study the many different effects of light in nature.
Natural light has a huge impact on the subject's appearance, which is affected by the light's color, direction, and angle. A lot of visual information is not captured in a photo, especially when taken with a cellphone camera.
In fact, only by painting outdoors can an artist fully observe the effects of linear and atmospheric perspectives and become proficient in rendering them.
11 Tips for Successful Plein Air Oil Painting
If you are new to outdoor painting, read the following 11 tips for a more enjoyable and successful experience.
We'll talk about:
- Equipment: pack light
- Crop your view
- Small is good
- Establish the value arrangement first
- How to choose the toning color
- Step back often
- Apply color respecting the value masses
- Beware of muddy colors
- Leave brushstrokes alone
- Use atmospheric perspective to your advantage
- Enjoy the process
Let's get started!
1. Outdoor Painting Equipment: Keep It Light
Select your equipment by focusing on effectiveness and portability. Keep in mind that fancy equipment does not necessarily improve the painting.
Perhaps the simplest setup you can use is a wooden sketchbox, held on your knees while sitting on a small, folding stool. The panel is held on the open lid. To prevent the box from sliding off your knees, it’s a good idea to have a belt or strap attached to the box and looped around your waist.
Painting standing up requires a lightweight but sturdy tripod-type easel or a wooden French easel. The easel should be well-made and not wobble once set up.
I like to use a French Easel and an airtight palette that keeps the leftover paint wet for a few days. This way, I am not afraid to squeeze out more paint for fear of wasting it.
To protect from the sun, wear a hat with a brim or visor, avoid sunglasses as they can distort your sense of color.
Then, of course, you’ll need paint, brushes, mineral spirit, paper towel, or rag, and a palette.
2. Crop Your View
The wide landscapes that you see with the naked eye can be very overwhelming, especially if you are used to painting from a photo. Choosing what to paint and how to crop it or center it in the picture is a challenge in itself and might feel like a huge time waster.
Practice choosing your point of view and good crops.
- To select and more easily visualize your subject, use a view-finder or some other framing device. Try studying several viewing positions, and choose the best one by making a few value studies and sketches.
- Position your easel in a way that the painting, and possibly the palette, are in the shadows. It is very difficult to correctly judge colors in direct sunlight.
- If you use an arm palette, hold it in such a way that it is not stricken by direct sunlight.

Painting outdoors takes you to beautiful places, and it's a totally different experience than painting from a photo.
Robie Benve, all rights reserved
3. Small Is Good
It is advisable for beginning outdoor painters to work on smaller-sized paintings and to quickly render small studies.
You can quickly create complete and effective studies by portraying the basic tonal and color construction features of a subject.
Small color sketches are an excellent way to paint with minimal equipment.
4. Establish the Value Arrangement First
Shadows and dark masses can change significantly in one hour.
Get started on your painting by establishing the size and position of the value masses. This is especially useful on a sunny day when shadows change quickly.
I always start by toning the canvas. To do this, rub in a mid-value tone over the entire surface.
Then, I like to clean out the parts where my light areas are going to be by wiping with a rag dampened with paint thinner.
After that, make a simple drawing and start painting the darker darks with thin paint.

"Schiller Park Bridge," oil on panel. One of my plein air paintings, completed in about two hours. Plein air painting by Robie Benve.
5. How to Choose the Toning Color
As the ground color for your tone, pick a color that is compatible with the subject’s final color harmony, thin it with mineral spirits, and rub it over the entire surface of the canvas, leaving no white spots.
When in doubt about what color to use, burnt sienna is always a good choice.
Clear out the lights by wiping them with a rag slightly dampened with paint thinner. Then put in the darker tones thinly.
This enables you to establish the tonal arrangement at the beginning, before the light changes.
6. Step Back Often
Using a stand-up easel enables the painter to step back to judge the painting from a distance.
You can judge colors and proportions more accurately when you step back.
If you use an arm palette, you can keep mixing the colors as you step back.
From a distance, you can see your painting as a complete unit, and you can judge and compare the individual parts.
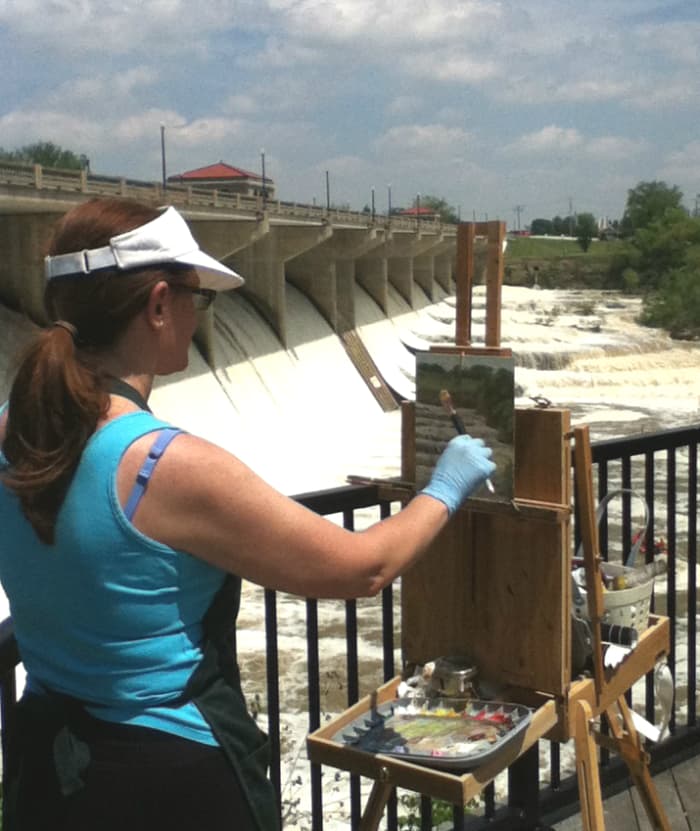
Robie Benve enjoys painting outdoors and embracing the challenges of the changing light and often unpredictable environment.
Robie Benve Art
7. Apply Color Respecting the Value Masses
Mix colors and apply them directly to the value masses, making sure you use colors of the correct tone.
A variety of colors is good, but keep your colors grouped in dark masses and light masses, keep squinting to make sure your colors are not too light or too dark.
Brushstrokes of the wrong value, in relation to the area where they are applied, may break the shape and ruin the value structure of your design.
Remember that intense colors in a picture can look much brighter when balanced against areas of more neutral colors.
8. Beware of Muddy Colors
When you paint outdoors with oils, you are bound to work wet-on-wet.
Keep in mind that when applying paint over a wet layer, the brush will pick up some of the paint below, and the next brushstroke you put down will have some of that mixed in.
It is essential to frequently wipe the excess paint from the brush and to use lean brushes for the lightest, brightest colors.
If too many brushstrokes are made without wiping the brush clean, the colors will become grayed out and look muddy.

Find a group or painting class! Painting with others feels safer and encouraging. Pictured: Group of plein air painters taking a class with Joseph Lombardo in Columbus, OH. This was a rainy and cold day, we painted under a shelter at a local park.
Robie Benve
9. Leave Brushstrokes Alone
Make brushstrokes with intent and let them be. Every single brushstroke adds something to the appearance of the painting and to the personal effect that the painter has envisioned.
Avoid blending, scumbling, and other fussy brushstrokes that will erase spontaneity and freshness from the painting.
When possible, use as few strokes as possible to paint form.
10. Use Atmospheric Perspective to Your Advantage
Atmospheric perspective allows the artist to introduce changes of color and value that make subjects recede into the background.
As you look at things in the distance, a curtain of atmosphere builds up between you and the distant objects. Colors and tonal values begin to change, in some weather conditions, quite drastically. Squint at your subject, and notice how things in the distance appear lighter in value and duller/cooler in color.
As you paint, push these changes a little, and exaggerate the shifts in value and temperature slightly in order to render depth effectively.
It’s only through the direct study of these different conditions outdoors that artists will become proficient and successful in capturing them.
11. Enjoy the Process!
Outdoor painting is challenging to say the least, but remember that it's more about the process than the finished product. Don't expect to go home with the masterpiece of your life. Take it as a learning experience and an opportunity to make some good studies to be used as a reference for some studio paintings. This mentality will make the first few times you paint outdoors much more enjoyable!
This content is accurate and true to the best of the author’s knowledge and is not meant to substitute for formal and individualized advice from a qualified professional.
© 2018 Robie Benve
Comments
Robie Benve (author) from Ohio on September 16, 2020:
Alicia, I hear you, correct proportions in paintings are a tricky thing to master. The best advice that I can give you if to compare, compare, compare. Use the handle of your brush, held in front of you, to compare the relative height of objects, use it again and again to see how slanted the angles are both on the subject and on the canvas. If the relationships between objects make sense, then the painting will look believable. I hope this helps.
alicia on September 15, 2020:
How can paint barns plain air i did a small one colors came out good barns were way too big. I have zero art school can you give me some tips on how to divide canvas or panel before i start.
Robie Benve (author) from Ohio on November 02, 2019:
Thanks a lot Terra, really appreciated!
Terra Mosley on November 01, 2019:
I love love love you and your work! It is just so inspiring!
Robie Benve (author) from Ohio on April 20, 2018:
Hi Jill, I find it very fascinating walking around and seeing painters creating beautiful artworks in a short amount of time. That's how I got started with plein air painting, I stumbled into an event and after seeing them I new I had to do that too. That plein air festival at Solomon's Island sounds intriguing, I need to check it out!
PS: It was wonderful meeting you! :)
Jill Spencer from United States on April 18, 2018:
Hey! It's wonderful to read your work and see one of your paintings. Although I don't paint, I go to the Plein Air Festival on Solomon's Island, MD, and watch. It's amazing to see what artists can create in a short time under often broiling conditions. Awesome to have met you, Robie! Looking forward to reading more of your work. Best, Jill
Robie Benve (author) from Ohio on January 23, 2018:
Hi Bronwen, I love painting outdoors with a group! We scatter around and each artist picks a different subject, but knowing that I am meeting up with others to paint gets me motivated to get up and get out, plus in some more isolated locations, it makes me feel much safer than being out there by myself. Thanks for reading and taking the time to comment. I'm thrilled that the article made you feel inspired. I hope you give it a try! :)
Robie Benve (author) from Ohio on January 23, 2018:
Hi Dbro, I know some amazing watercolor artists that paint outdoors regularly, and when they enter a plein air competition they win top prizes. Give it a try, you might end up loving it. :) Thanks for your insightful comment!
Kristen Howe from Northeast Ohio on January 22, 2018:
You're very welcome Robie. I couldn't have agreed with you more.
Robie Benve (author) from Ohio on January 22, 2018:
Thanks Kristen, I'm glad to hear you found the article interesting and you learned something new, That's part of the wonderful experience of online writing, where knowledge and inspiration can be shared quite easily. Thank you for your lovely comment.
Robie Benve (author) from Ohio on January 21, 2018:
Hi Chitrangada, thanks a lot for your positive feedback! I love that you are passionate about painting, especially landscapes, it's one of my favorite subjects too. :)
Bronwen Scott-Branagan from Victoria, Australia on January 21, 2018:
Thanks for an interesting article. Our artists' group has en plein air events each month, but I've never joined them. Perhaps I will, after reading this.
Dbro from Texas, USA on January 21, 2018:
Great article, Robie! I have never painted en plein air, but I have done drawings on site. It is a great experience. I would like to paint outdoors, but I haven't tried it yet. I paint in watercolor, but I'm sure much of the process is the same as you describe with oils.
Your article has inspired me to give outdoor painting a try. I'm sure these paintings have a spontaneity that many paintings created in the studio do not have. I'm eager to see what changes in my work might be manifest when I paint them on site.
Thanks for this informative and interesting article!
Kristen Howe from Northeast Ohio on January 21, 2018:
Robie, this hub was very informative and instructrual on how to do plein air painting. I never heard of it. But it sounds interesting. But that painting you did was beautiful. I'm sure this would encourage others to embrace the outdoors and paint.
Chitrangada Sharan from New Delhi, India on January 20, 2018:
Great article and very helpful tips for outdoor painting.
You explained everything clearly. A good writer and a good painter.
I enjoy painting, since my childhood, and landscape painting is one of my special area of interest.
Thanks for sharing!


