How to Make a Wet Felted Vessel With a Matching Felt Lid

Wet felted vessel with a fitting lid
Sally Gulbrandsen
About This Tutorial
Creating a wet felted vessel with a beautiful shape and a fitting lid might seem like a daunting task until you realise that it is possible to employ a few basic household items to help you achieve considerable success.
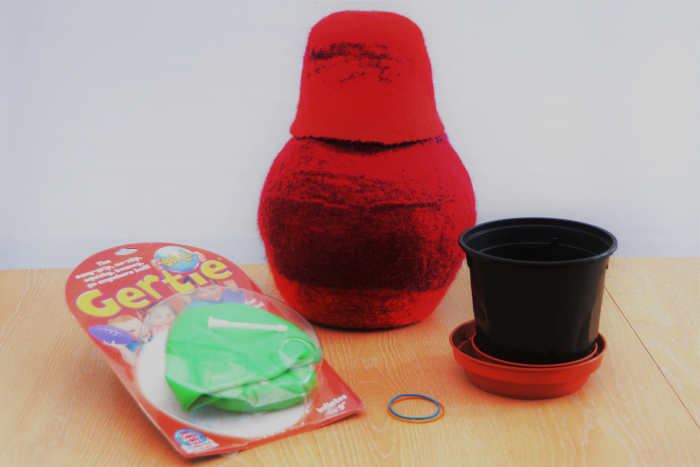
A few of the items which will be needed to complete this tutorial.
Sally Gulbrandsen
Items Needed
- Underfloor laminate to create the template. This can be bought at your local hardware store or from Amazon.
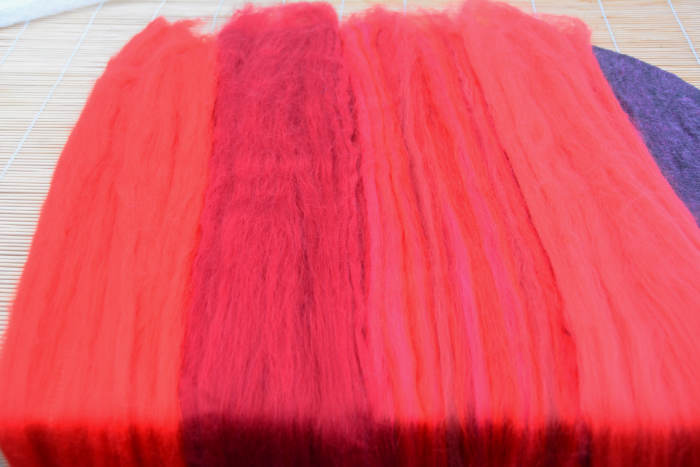
- Corriedale needle or wet felting wool for the inside layer of your vessel.
- Merino wool roving for the top surface of your vessel. (I used one fairly thick layer of Corriedale and one of merino wool put down flat. You should use three layers of wool if you decide to put your fibers down in the more conventional way.)
- Olive oil soap grated and diluted in warm water—or alternatively, you may use dishwashing liquid which has been diluted in warm water.
- A small squeeze bottle for the soapy water.
- A sheet of bubble wrap.
- A pair of sharp scissors.
- A Gertie Ball to create the rounded shape for the vessel.
- Two plastic pots and two plastic pot holders.
- One heavy-duty bamboo blind. Alternatively, bubble wrap can be used.
- A tumble dryer, which not only saves time but helps to create a much firmer felted vessel.
- Paverpol Transparent Fabric Hardener, if it's required to make the vessel hard. Paverpol will change the texture of the wool but can be useful if a firm structure is needed for the end product. I did not use it in this case.
- A small paint brush or recycled tooth brush should be used to paint the Paverpol onto the inside surface of the vessel if used.

Corriedale and Merino wool for wet felting.
Sally Gulbrandsen
Step 1: Create the Template
- Draw the template onto a sheet of underfloor laminate.
- Use the measurements shown below.
- Cut it out.

Template Measurements
Sally Gulbrandsen

An indication of how much shrinkage will take place during the process.
Sally Gulbrandsen
Step 2: Cover the Template With Wool Roving
- Use the Corriedale wool for layer 1.
- Flatten the fibers out as shown below and cover the surface of the template with fiber.
- Allow the wool to extend to just beyond the edges of the template.
- Ensure that each layer is laid out evenly with no thick or thin spots.
- It may help to wet the template first as each row is put down.
- A little water will help the wool adhere to the template.

Layer 2. Template covered in flattened corriedale wool
Sally Gulbrandsen
Step 3: Wet the Wool
- Wet the fibers with the warm soapy water and smooth out until the edges of the template.

Wet with warm soapy water and rub until smooth.
Sally Gulbrandsen
Step 4: Flip the Project Over
- Carefully turn the project over to the other side.

Flip the project over onto the other side.
Sally Gulbrandsen
Step 5: Neaten the Edges
- Turn the dry edges of wool to the other side of the template.
- Use a little warm water and your fingers to neaten the edges.

Turn over any excess wool using warm soapy water and your fingers.
Sally Gulbrandsen
Step 6: Cover the Second Side
- Cover the second side of the template with flattened fibers as is shown below.
- Only fill in those parts of the template which are still exposed.
- The idea is to completely cover both sides of the template with an even layer of wool which has no gaps or holes anywhere.
- There should be no thick or thin spots anywhere.

Fill in the uncovered areas using rows of the corriedale wool
Sally Gulbrandsen
Step 7: Wet the Wool
- Use the squeeze bottle filled with soapy water to wet the fibers.
- Smooth and flatten the wet wool beneath your fingers.

Wet the surface with warm soapy water.
Sally Gulbrandsen


Step 8: Cover the Project
- Cover the wet wool using a sheet of bubble wrap.
- Wet the surface of the bubble wrap and rub well with your fingers.
- Rub until flat and smooth.

Cover and wet the surface of the bubble wrap.
Sally Gulbrandsen
Step 9: Carefully Lift off the Bubble Wrap
- Neaten the edges by turning the project over and tuck in any loose ends.
- Wet and smooth out any stray pieces.

Rub well and gently remove the bubble wrap
Sally Gulbrandsen
Step 10: Neaten the Edges
- As can be seen here, the first layer of wool is now complete and the edges have been neatened.

Neaten the edges.
Sally Gulbrandsen
Step 11: Cover the First Layer
- Cover the 1st side of the template with flattened merino wool fibers as is shown below.
- Extend the wool on one edge as is shown.
- This wool will be used to cover the second side without having to alter the stripes in the wool as this is the look I required.
Open and flatten the merino wool fibers and arrange an even layer over the 1st layer of wool.
Sally Gulbrandsen
Step 12: Wet the Wool
- Wet the fibers which have been laid out on the template.
- Don't wet the fibers which extend beyond until the template as these will be arranged on the other side when the template is turned over.

Wet the wool and rub until smooth
Sally Gulbrandsen
Step 13: Turn the Project Over
- Carefully flip the project over.
- Be careful to maintain the stripes if you want them to extend right around the vessel as I did.
- Cover the second side using the wool that extended beyond one edge (stripes) as is shown below.
- Fill in any empty spaces with additional merino wool.
- There should be no thick or thin spots.
Flip the project over and cover the previous fibers using the overlapping fibers to cover the previous layers.
Sally Gulbrandsen
Step 14: Complete the Second Side
- Once both sides of the tempate have been covered with wool, smooth down with warm soapy water.
- Neaten the edges.
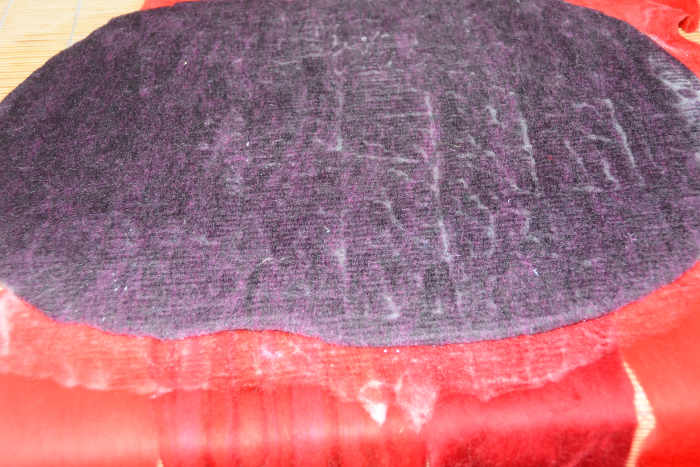
- Cover with bubble wrap and rub both sides until the wool is flattened.

The 1st two layer of corriedale covered in Merino wool fibers.
Sally Gulbrandsen
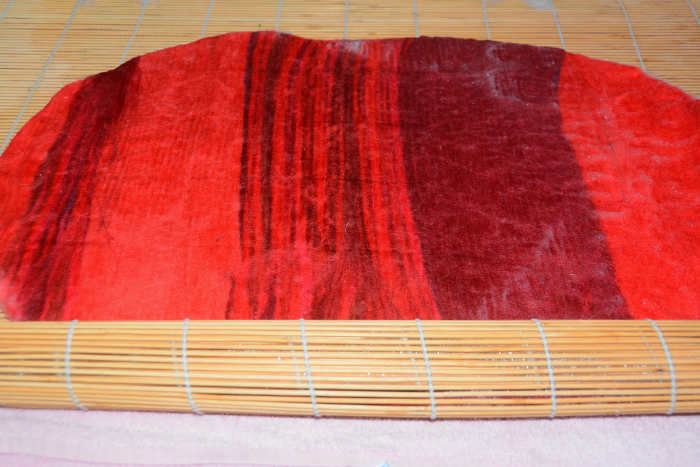
Step 15: Roll
- Roll the project up inside a large bamboo blind.
- Roll gently at first and as the wool begins to firm up, roll a little harder.
- Keep on turning the project inside the bamboo blind to ensure that you achieve even shrinkage from all sides.

Roll gently at first, inside a large bamboo blind.
Sally Gulbrandsen
Step 16: Change the Direction of the Roll
- The project should be turned regularly whist inside the blind.
- Keep on turning and rolling until the fibers shrink back and the template starts to buckle.
Keep on turning the project inside the bamboo blind. Roll from different directions to ensure even shrinkage.
Sally Gulbrandsen
Step 17: Remove the Template
- Cut off the top quarter of the project and remove the template.
- The top quarter of the project will be used to create the lid.
- The bottom three quarters of the project will be used to create the vessel.

Cut off the upper 3rd of the project which will be used to make a lid.
Sally Gulbrandsen
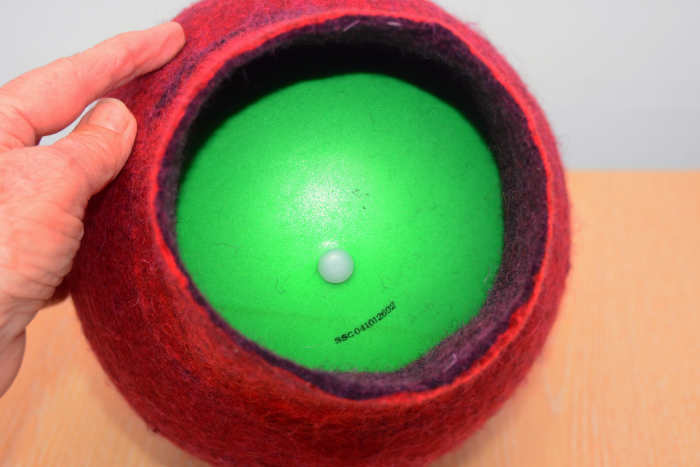
Step 18: Inflate the Ball
- Inflate the Ball until it is firm.
- Seal it with the little plug as is shown.
- Place the Gertie Ball on one the larger plastic pot holders as is shown below.
- Ensure that the inflation hole can be viewed from above.
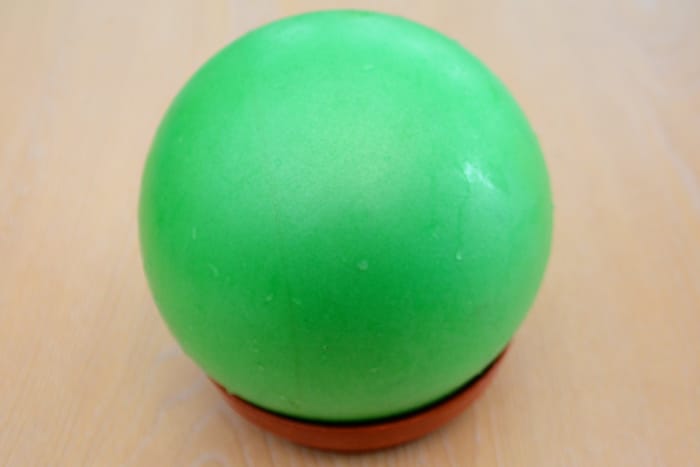
Blow up the 'Gertie' ball and place it inside the largest pot plant holder with the vent hole facing upwards.
Sally Gulbrandsen
Step 19: Insert the Pot Holder and Ball Into the Cavity
- Place the plastic pot holder and the ball into the larger of the two felted pieces.
- Ensure that the inflation hole can be seen from above.

The vent hole on the 'Gertie' ball showing for easy retrieval of the ball.
Sally Gulbrandsen
Step 20: Add a Black Plastic Pot With Plastic Bags
- Fill the plastic pot until firm with recycled supermarket bags and place it on top of the ball, with the open side against the ball.

Firmly fill 1 black plastic plant pot with supermarket bags (recycled)
Sally Gulbrandsen
Step 21: Insert the Plastic Pot
- Put the filled plastic pot face down on top of the ball as shown.
- Place the pot holder, ball and filled plastic pot inside the larger of the two felted pieces as is shown.
- Ensure that the vent hole of the ball is centered directly below the down plastic pot so that the air can be easily extracted when required to do so.
- Use string or elastic bands to secure the items placed inside the vessel.
- Smooth out any obvious 'pleats' or tuck in the actual fabric of the wool to ensure that they it does not get felted that way.
- The idea is to make the surface of the finished item as smooth as possible.
- Keep on adjusting the ties or elastic as the vessel starts to shrink back.

The plastic pot filed with recycled supermarket bags.
Sally Gulbrandsen
Step 22: Secure All Items
- Use string or elastic pieces to secure the pot holder, ball and upturned plastic pot that have been placed inside the vessel.

Tie firmly and place a few elastic bands around the circumference of the project.
Sally Gulbrandsen
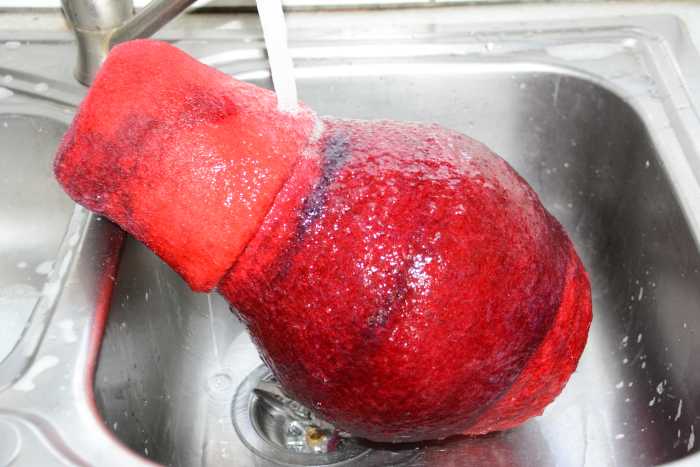
Step 23: Shrink the Vessel
- In the kitchen sink, add soapy water to the project and start rubbing under hot and then cold water.
- The vessel will soon take on the shape of the items which you have inserted inside it.
- Adjust the ties as the vessel shrinks back, making sure that no folds or pleats are created along the way.
- For greater shrinkage when the items have taken on the shape, insert the shaped vessel into a tumble dryer and continue shrinking it until the wool becomes firm and tight against the contents.

Shrinking the vessel using soap and water under hot and cold water.
Sally Gulbrandsen
Creating the Lid

Add these two items to create a fitting lid.
Sally Gulbrandsen
Insert as Shown

Place the upturned pots inside the upper half of the top half of the project (the lid)
Sally Gulbrandsen
Step 24: How to Make the Lid
- Pace one pot holder and one empty plant pot inside the top third of the project as is shown.
- Add soapy water to the wool and rub until it shrinks as is shown.
- Once sufficient shrinkage has taken place, tuck the loose ends over the edges of the plastic pot and put the incomplete 'lid' onto the vessel as is shown.
- Continue rubbing both items until you are satisfied with the fit and the amount of shrinkage that has taken place.
I employ a tumble dryer to shrink most of my items and by so doing, I manage to achieve a much firmer felt. The items inside can be secured with elastic bands or ties, even shrink wrapped together for short periods if desired. Always check the items regularly if you use a tumble dryer to make sure nothing untoward happens when you are not looking.
Step 25: Shrinking the Lid
- Soap the wool covering both the plastic pot and the plastic pot holder.
- Rub until the wool shrinks tightly against both pot and holder.

Wet with hot soapy water in the kitchen sink. Add more soap as required.
Sally Gulbrandsen
Step 26: Shape the Edges
- Neaten the edges by folding the excess wool over the edges of the plastic pot and continue rubbing to shape the vessel lid.
- At this stage, the lid can be placed over the neck of the vessel where you can continue rubbing and wetting with both hot and cold water to shrink the fibers even more.
Turn the edges over on the edges of the plant pot and insert the bottom half of the project as shown.
Sally Gulbrandsen
Step 27: Trim the Lid
- Once you are satisfied that enough shrinkage has taken place, rinse and trim the edge of the lid as is shown.
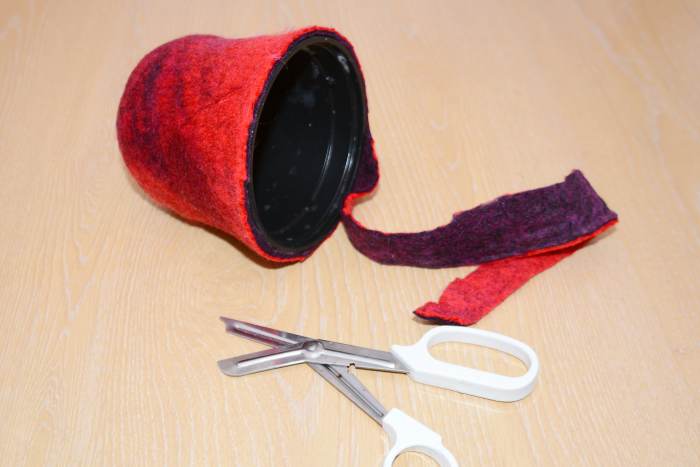
Trim the pot when the felt has been firmly fulled. The firmer it is, the better the lid will hold it's shape.
Sally Gulbrandsen
Step 28: Trim the Vessel
- Trim the vessel neck in exactly the same way and remove the plastic pot.
- You may have to squeeze the pot holder in half to allow you to extract it from the vessel without doing any damage to the neck.
Trim the vessel and remove the plant pot with it's filling, deflate the ball and remove. Finally remove the plant pot holder by folding it in half to enable it to escape the now narrow opening.
Sally Gulbrandsen
Step 29: Deflate the Ball
- Deflate the ball and extract it.
- Finally, squeeze both sides of the pot holder together to form a half to allow you to extract it easily from the vessel.

Vessel and Lid
Sally Gulbrandsen
Step 30: Harden the Vessel (If Required)
- Paverpol transparent can be used to harden the vessel if desired.
- Paverpol makes the vessel weatherproof.
- Paverpol should be painted inside both the vessel and lid and left to dry.
- Paverpol will however alter the texture of the wool, making it hard to the touch.
- You should be aware of this before proceeding.
- Generally I only use Paverpool for items which are to be left outdoors in all weathers.
- I also use it to harden wet felted lamps.
© 2021 Sally Gulbrandsen
Comments
Sally Gulbrandsen (author) from Norfolk on May 10, 2021:
Hi Donna, I would add the embellishment before any beading or embroidery as it would be almost impossible for a needle to penetrate the vessel. Paverpol will change the texture but this should not be a problem if you want to use the vessel outdoors. One of the bird pods I made has been outdoors for over a year and it still looks the same as it did the day I made it. Thanks so much for stopping by Donna, always great to have some feedback:) Stay safe and all the best to you and yours.
Donna Herron from USA on May 10, 2021:
Wow, Sally! I think this is my favorite project of yours that I've seen so far. One question - would the shape of the finished vessel be deformed if you wanted to add embellishment like embroidery or beading? Should embellishing be done after using Paverpol? Thanks!
Sally Gulbrandsen (author) from Norfolk on May 06, 2021:
Thank you very much Pamela. I am glad you were able to understand my instructions. The feedback means a lot to me. Best wishes.
Sally Gulbrandsen (author) from Norfolk on May 06, 2021:
Hi Mary, lovely to have you back on one of my pages. No need for courage and of course, it is sometimes you are allowed to just look and enjoy! My best wishes to you and yours.
Sally Gulbrandsen (author) from Norfolk on May 06, 2021:
Thank you Iqra, glad you like the vessel and of course, you are very welcome:)
Sally Gulbrandsen (author) from Norfolk on May 06, 2021:
evika, yes, I am safe and well and looking forward to some sort of normality in these very strange times. Yes, it has been a while, I guess sometimes needs a little more time to focus in on the things which one loves doing. All the best Devika.
Pamela Oglesby from Sunny Florida on May 06, 2021:
This project turned out very well. Your clear instructions are also very good. Thank you for explaining this project so clearly, Sally.
Mary Norton from Ontario, Canada on May 06, 2021:
Sally, you have mastered felt and your projects are really interesting. I have to find courage to do any of them.
Iqra from East County on May 06, 2021:
Wow wonderful and nice method to making vessel. I like this cute felted vessel. Thanks sallybea :)
Devika Primić from Dubrovnik, Croatia on May 06, 2021:
sallybea You are at it again full of surprises and with another creative piece. I think you are the only one here sharing such beautiful ideas. It has been a while since I saw a new hub must have missed a few. Hope you safe and well
Sally Gulbrandsen (author) from Norfolk on May 06, 2021:
Thank you Kathy, I appreciate your stopping by to comment:)
Kathy Henderson from Pa on May 06, 2021:
Wow, that is commitment and turned out lovely.